High Road approached me earlier in the preseason to make an arena for them, and it seemed like a perfect opportunity to do a small article on the process I go through doing one if anyone is interested in doing one themselves in the future.
To make an arena, you’ll need a map editor. Currently, the most used map editor is Drake’s Continuum Map Editor or DCME (Drake Continuum Map Editor download | SourceForge.net), which is a buggy piece of software that manages to do the job. There are other editors that exist that are much harder to find, such as the old Subspace Map Editor ( SSME patched (mediafire.com)) Some people prefer this, so the choice is up to you. I’m most familiar with DCME, so that’s what this guide will focus on.
MAKE SURE YOU CONSTANTLY SAVE YOUR WORK!
DCME is very crash prone, so before you learn what causes those crashes, you will accidentally close your work multiple times before you are done. Don’t forget to save!
The first thing you will want to think about is the Theme, and what colors you want to focus on. Generally, I try to pick two primary colors to work with and then accentuate after that based on what fits the team. You can also go with mainly one color (like a Creasers) of course.
Arenas primarily function off of Tilesets, which is a .bmp file with a square of 16×16 pixels representing each “tile” you see in the game. Certain spots on the tileset are configured differently by the game (such as tiles you can fly over or underneath). Generally, you’ll want to start with the default RSHL tileset and then customize the tiles as you see fit, replacing tiles that aren’t necessary with whatever you like.
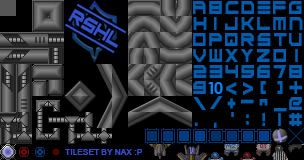
You can mix and match sections of other tilesets to come up with something if you aren’t interested in playing around with the tiles themselves. Something easy you can do is open the tileset up in any photo editor, select a section like the font or the boards, and do a Hue/Saturation or Color Balance layer to find an adjustment color that you like. This can take an old tileset that has been used and make it look radically different.
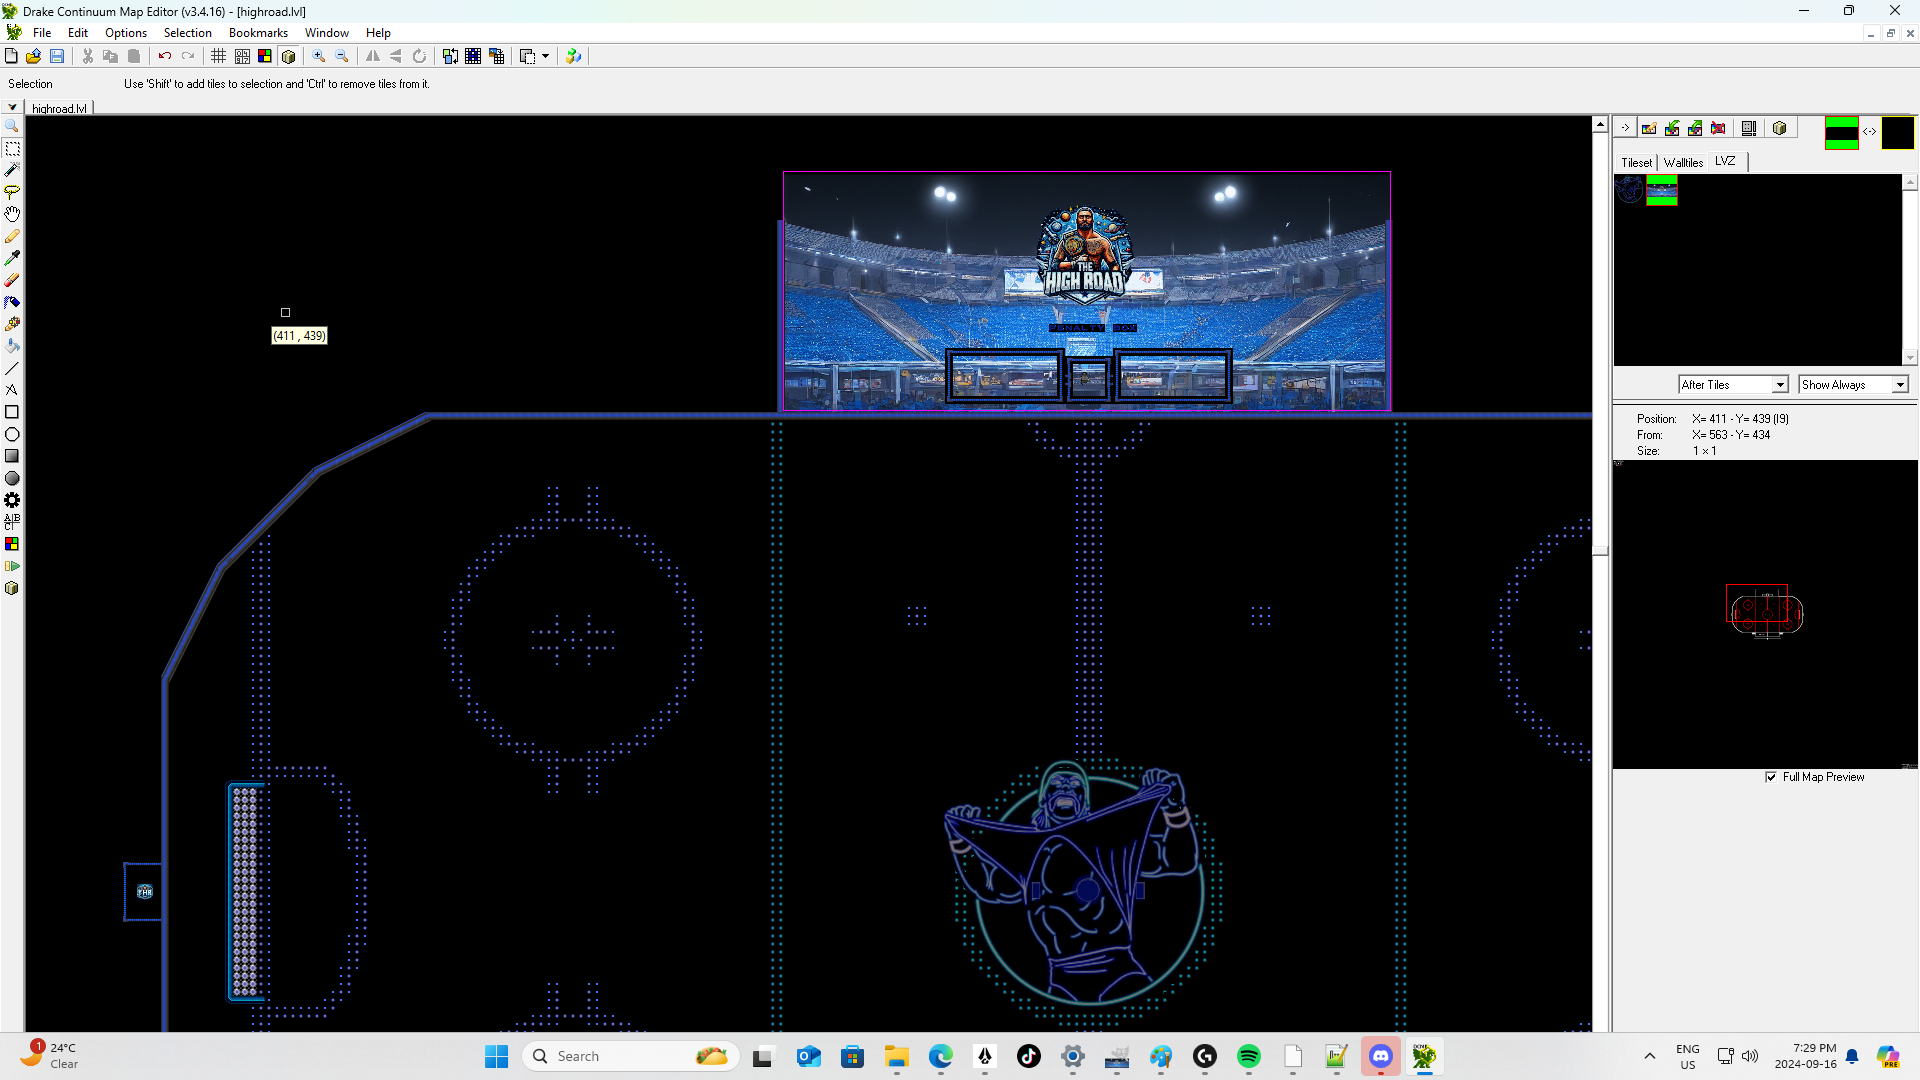
You can see a preview of what the arena looks like as you make edits, so play around until you find something you like. In this case, I’m going to start with an old tileset that I’ve made in the past for Goal Goblins.
It isn’t much different than the normal tileset, but I think the boards will work well, and I’ll replace any parts that don’t fit. You’ll see that many of the faces and bigger pictures are cut into sections. If you want to make a bigger square image, often you’ll have to do this so that you can pick unwanted tiles to replace on the set.
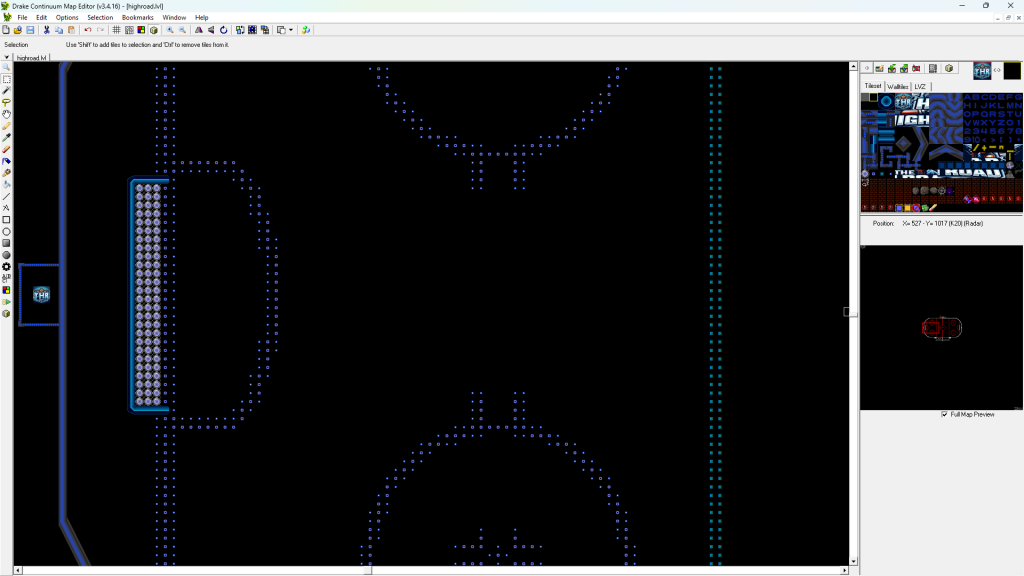
You can start with the current RSHL arena, and then Import Tileset (the green arrow button beside Edit) with something else if you want to follow a similar idea. The default RSHL arena has a bunch of old trophies and other writing on the map, which you can zoom out and delete if you’d like.
So when I am done with that, I end up with something like this:
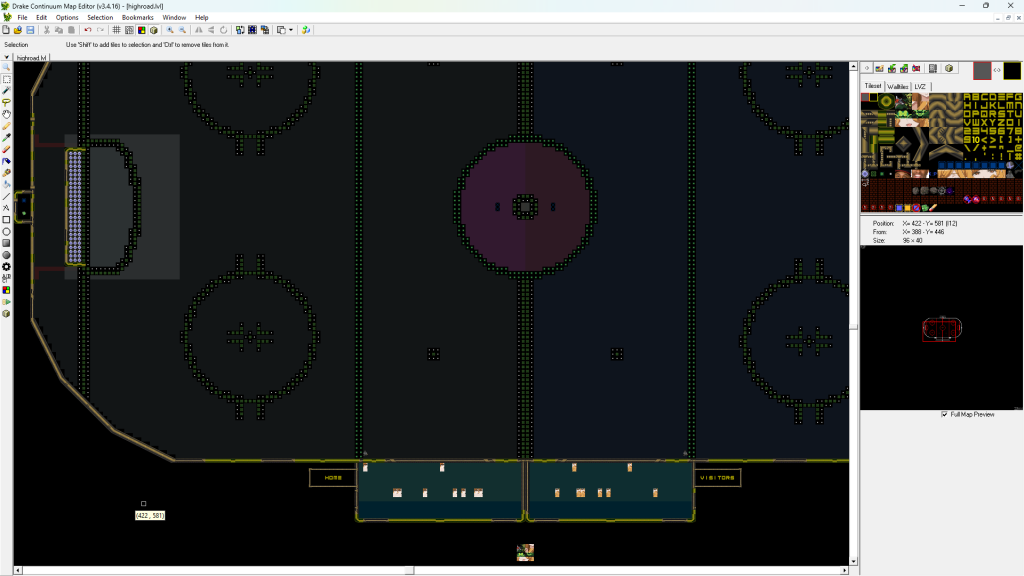
The shaded tiles are what are called ASSS Regions, which is what controls the stuff in our game that determines creases, stops the goalie from crossing the blueline, what counts as a shot, and other things taken care of by the system. They’re beyond the scope of the guide and as long as you avoid specifically going into the “Regions” tool and changing them, you can do whatever you want to the map and they won’t be affected. You can go under options and Hide Regions if you’d like to see the map without them.
One thing you’ll notice is that now many of the graphics and the boards are messed up. At some point in the past the default tileset was changed and the parts the make up the rink were moved around. This is one downside of using old tilesets; I will have to go in and use the pencil & line tool to replace tiles with what they should be. This won’t take very long, but it is a little extra work. You can avoid this by editing and replacing the current RSHL tileset directly and not importing an old one. But I already did it, so I’ll just fix it up later on.
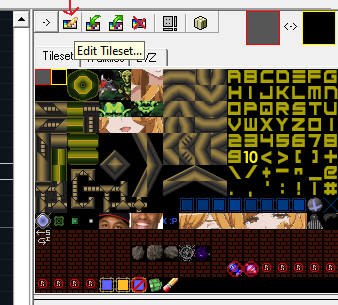
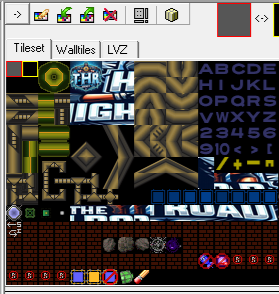
Clicking Edit Tileset on the right of the DCME screen will bring you to this window.
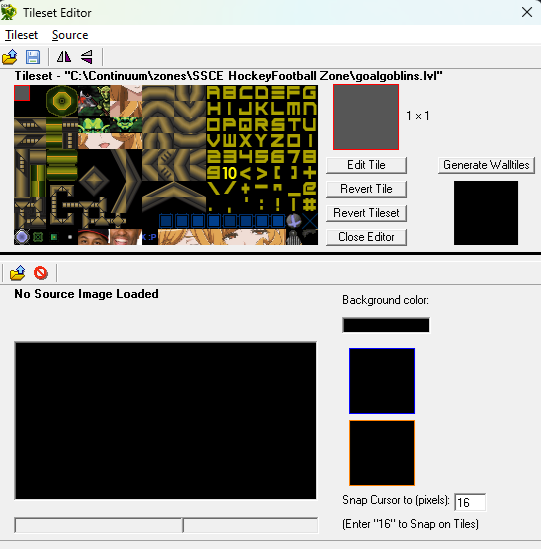
The Tileset Editor is where the bulk of your work map editing will be done. Using the bottom window, you can open another image and directly drag and snap the new “tiles” (regions of 16×16 pixels) to the new image. Doing this you can take portions from other tilesets, or copy images over like a logo. To start with, I’ll replace the Goal Goblins logo with High Road imagery.
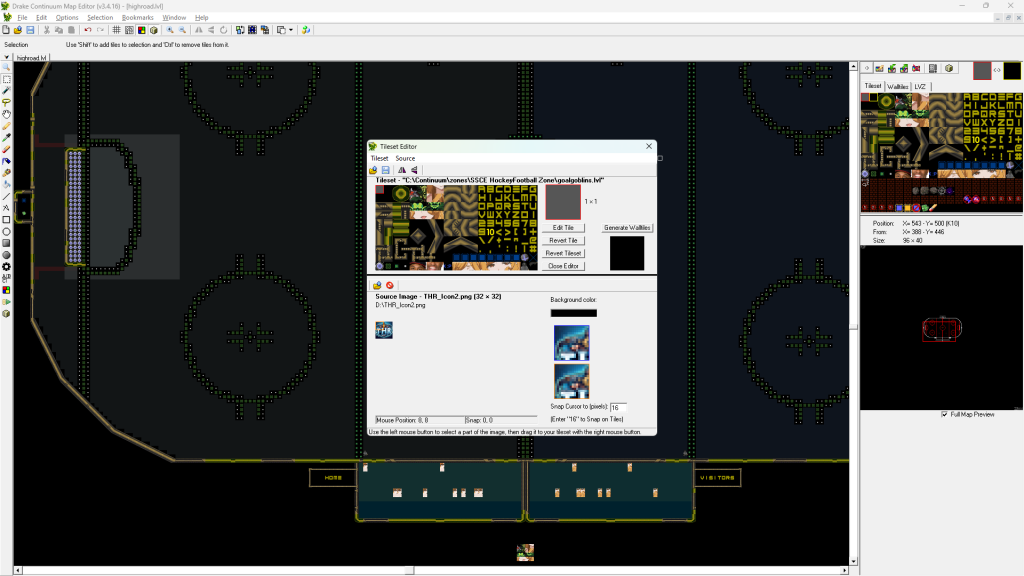
You use the Left Mouse Button to select a tile from the bottom image and the Right Mouse Button to drag the selected tile from the bottom image to your tileset.
Be careful with your clicks! This is one of the screens where double clicking in the wrong place is liable to crash your program. Be warned!
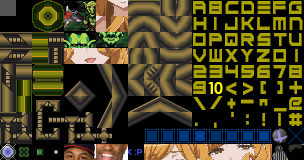
I decided to just use the logo and banner, which meant replacing some of the alphabet for more space! I replaced the letters remaining with the ones from the Janitor arena, as the font seems like it will work fine for this. Next, I’ll export this tileset into a .bmp so I can open it up in a photo editor (green arrow pointing out).
Instead of taking the time to do layers and all the selections necessary to color individual parts, I find it easy to just work on the whole image at once and then copy over the parts you like before starting again.
GIMP is free if you don’t have photoshop, and works just fine for a project like this.
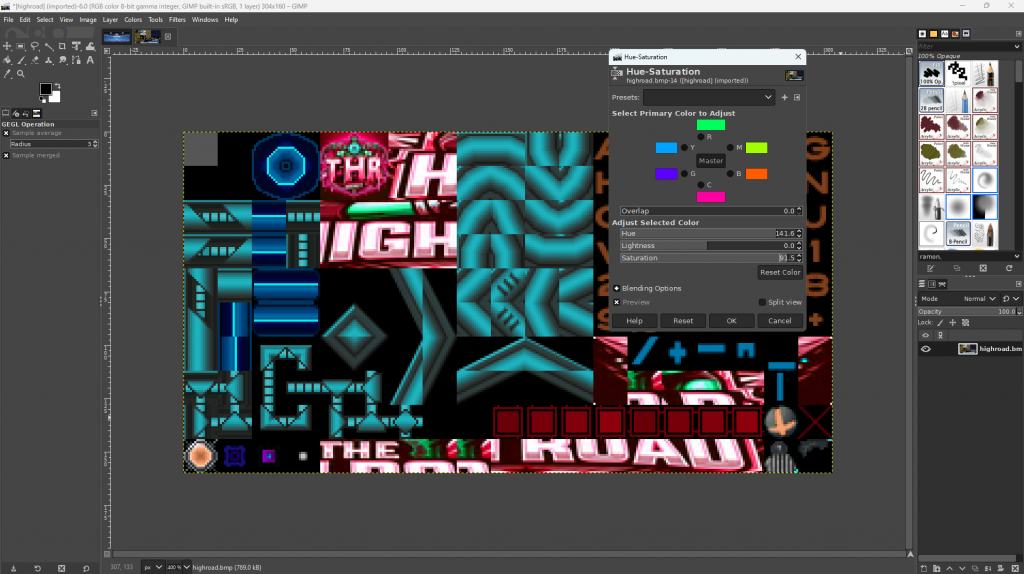
All I care about in this hue-saturation pass is getting a color for the posts that I like. That blue split looks great, so I’ll keep that and transfer it back to my tileset. Since my tiles were messed up on the map, I’ll take the time to use my pencil & line tool to fix them and see what they’d look like.
Looks great! Now, I’ll repeat this process for the boards, the marks on the rink, and the font of the text. As I go, I’ll check the map and fix any errors with placement that may have happened.
Try to remember to switch back to the selection tool when you are done editing tiles.
An accidental click with the tile tool can be hard to see, but a bad tile in the middle of the rink will make the entire arena unusable. Be careful and double check for random tiles occasionally.
Only two crashes later, and now it looks like this. A functional rink with a color scheme, and the team logo and banner built in. This is a playable rink that could be submitted for a team to use as it is. But, now we’re going to spice it up with LVZ.
What is a LVZ?
A LVZ is basically any graphic or sound sent to display in the game that does not exist within the tileset. Mostly for HZ, these are going to be the Center Ice graphics that you see as well as any other artwork available on the map.
LVZ Scripting – ASSS Wiki (archive.org)
If you are interested in the inner workings of how a .LVZ works
There are two options to building .LVZ. The first is learning how to use the LVZ Toolkit, for which you have to learn the format of how to make the .INI to generate the LVZ for you. It will stop itself before it breaks anything and it won’t affect your map directly so this is the “safest” and the “proper” way to do it.
stuff.lanowen.com – /Continuum/editors/LVZ Toolkit/
You’ll need the LVZ Toolkit to build LVZ yourself, which you can find here (save link as).
BuildLevel is what we run to make the .LVZ ourselves.
DeBuildLevel will extract the contents of a built .LVZ and make a copy of the settings used to make it, so you can easily replace and rebuild new .LVZ
The example, readme, and debuildlevelhelp can be useful for reference. The easiest way to learn is just to DeBuildLevel an existing LVZ in RSHL that you recognize (like a center ice, or the crease line) and see how the INI was formatted. You can work off a template like that to easily change the file and keep the position coordinates (for something like a Center Ice) or get a sense of the format to change things to your liking.
DCME does have LVZ support built in, which is more straightforward and user friendly than the LVZ Toolkit. You can add your images directly in the program, change the settings in the UI, and DCME will build your LVZ and export it alongside your LVL (Arena) file.
The downside to doing it this way are the traditional problems of DCME; likelihood of crashing if you manipulate it the wrong way. As a first time user, I recommend trying it through DCME and just saving frequently unless you are already familiar with configuration files.
If you would like to eventually expand into doing animations, playing music, etc. you will need to learn how the LVZ Toolkit works regardless.
I’ll do both my .LVZ through DCME to stay consistent with the guide.
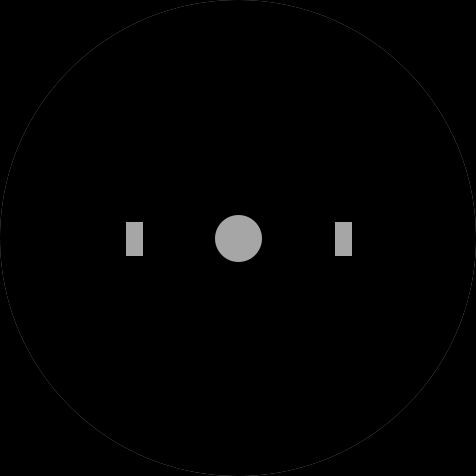
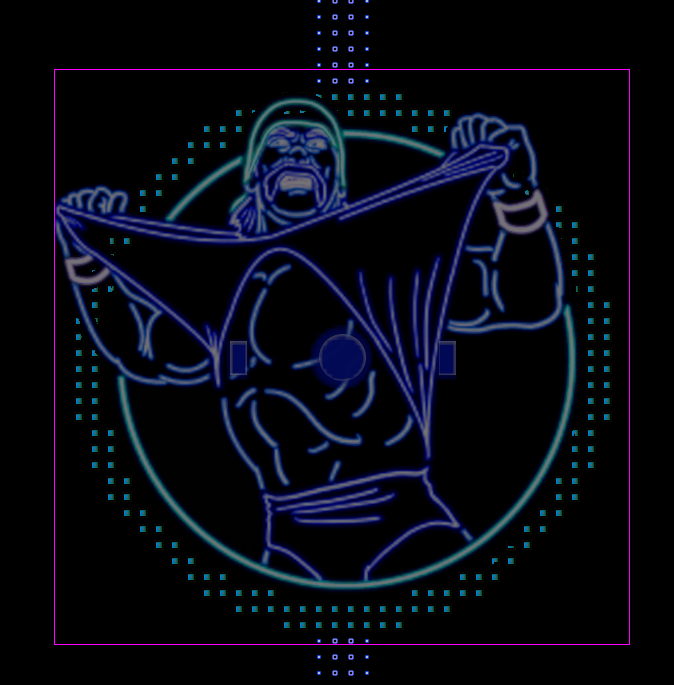
Making a CI is somewhat out of scope of this guide. There will be a CI PSD template from the allstar game that has the above as well as some other markers available on the discord. You can use that to position your artwork how you’d like. The circles match up with the safe zones and drop circle in the game, so you can overlay this above your art to line them up.
After some edits. I end up with this, which is a little offset than the normal size, so that will be good practice for DCME.
One Note: TRUE BLACK is invisible in continuum, while any black that is not #000000 will overlay tiles.
In the case of this image, I used a magic want to select outside of the light blue circle and made the black in that region #000000. That should make sure the the middle of the drop circle is covered, but the outside won’t be. BMPs will be the recommended filetype here as you can have black issues using PNG’s or other formats.
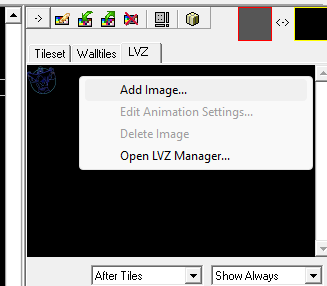
In DCME, I can right click here and add image. Then, in the LVZ Manager
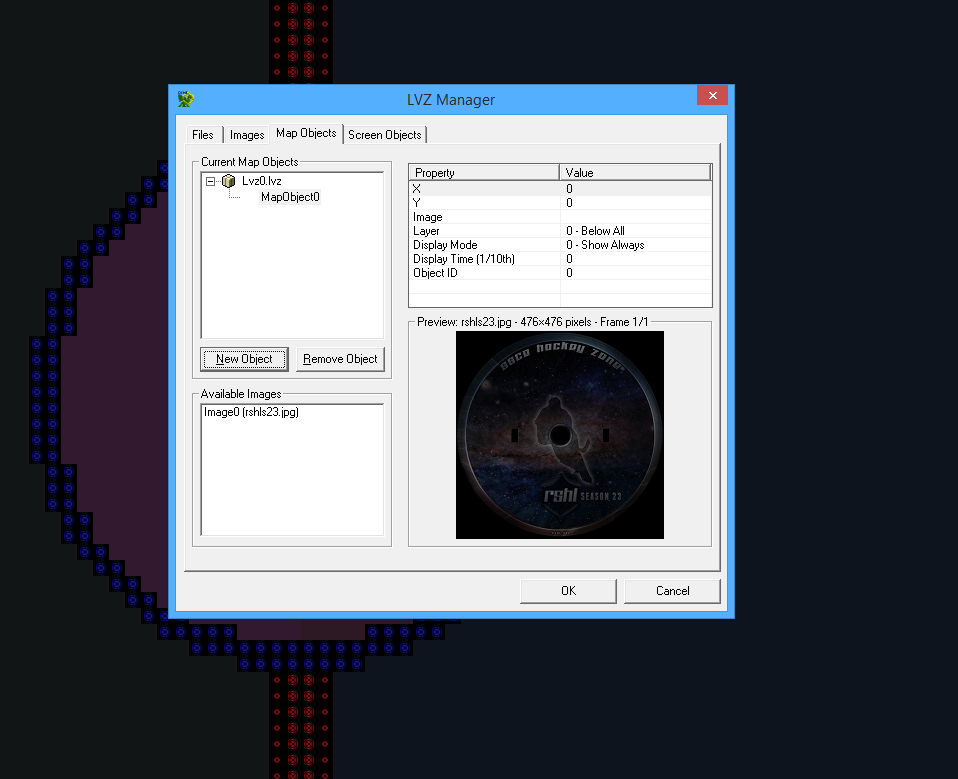
You can click new object under “Map Objects” to add the CI to the map, and then click Image (on the right pane) and double click under your available images to load the file you just added in the prior step.
Then, you can use 7953×7953 as the X/Y coordinates to center the CI, or use the LVZ tool on the very bottom of the left toolbar to move it to the correct position yourself.
Make sure the Layer is set to Above Tiles and the display mode is left at Show Always. Otherwise, you may have display issues.
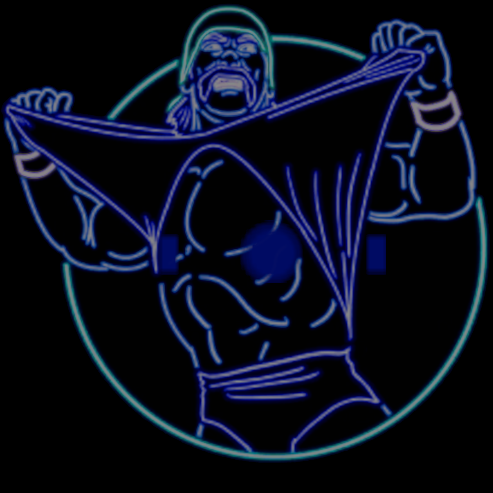
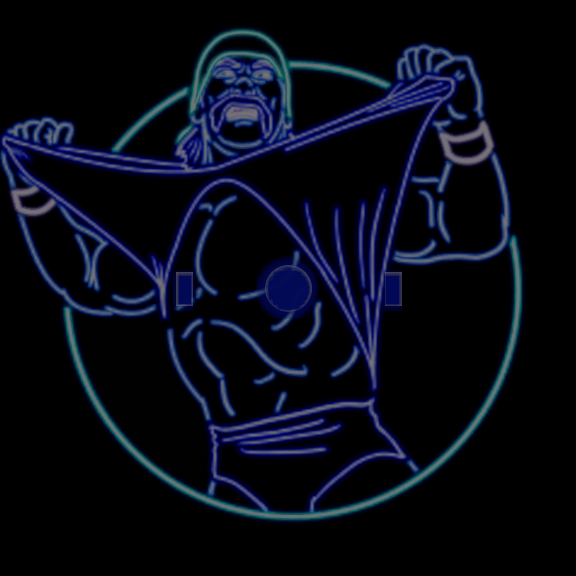
When I’m done with those steps, I’m left with this sample .lvz. Now, I want to do one for the boards as well.

I add the LVZ using the same process, this time setting the MapObject to be AfterBackground instead of AfterTiles because I’d like the penalty box to still show up above the graphic.
If your graphic won’t display in-game after you do this, try changing the file format or saving as a different color format of BMP.
At this point, the arena is ready to go and be uploaded. It can be sent off to someone (usually the owner or another staff member) to be added to the server. After that, you can update anything that seems like it may look off.

Advanced LVZ
Did you know you can make your LVZ into animations?
A more advanced technique is using the available LVZ system to make animations.
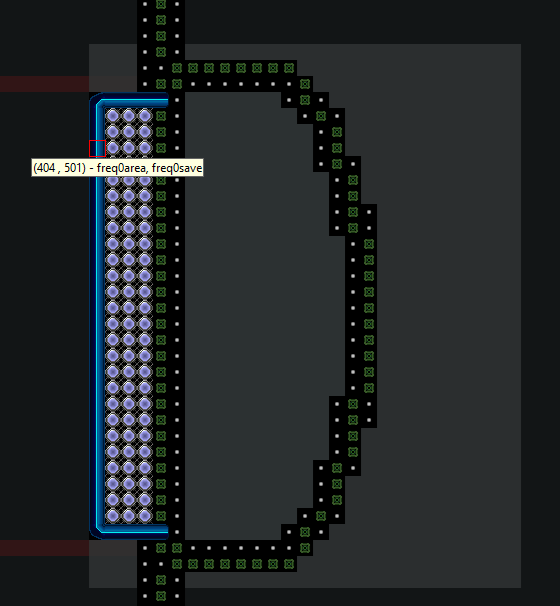
Essentially, animated images need to be laid out like the form of a comic strip. Each “square” in the strip is a frame of the animation that will play.
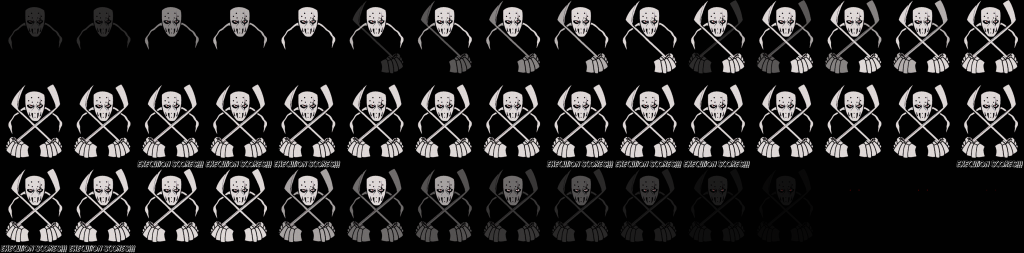
The .INI file for this animation would look like this:
Outfile=exgoal.lvz
File=exgoal.png
[objectimages]
IMAGE0=exgoal.png,15,3,450
[mapobjects]
[screenobjects]
C-113,C-350,IMAGE0,TopMost,ServerControlled,450,501
The important line is the “objectimages” section
IMAGE0=exgoal.png,15,3,450 determines how the LVZ is going to play
in object images, “15,3” is the layout of the animation frames (15 wide, 3 high); 450 is the time length for one loop of the animation
in screen objects: C-113,C-350, is the image’s position, TopMost is the layer, 450 is the length of time to show it (in this case the same as one loop), 501 is the image number.
The image position is done by picking an anchor point and changing the location based on that (in pixels). So C-113 as the “X” value is saying 113 pixels to the left of the reference point. C-350 as the “Y” value is saying 350 pixels above the reference point. A positive value is moving to the right (on the X axis) or down (on the Y axis).
What’s important to recognize here is that the game is going to do the math itself to determine the speed of the animation based on these values and the size of the image.
So a line like the following:
IMAGE0=randle_nyk.png,7,4,450
Would be a 7×4 animation (That is, 7 FRAMES wide by 4 FRAMES high) that plays for 450ms in total.
Animations in Continuum are regular image files, with each frame put right next to each other. Arbitrary animations, such as those found in LVZ files can be any number of tiles wide or high. So you could make a 10 frame animation be 2×5 or 5×2 and they would both work identically. Notice this means that if an image appears to be 1000 pixels by 200 pixels, it could actually be a 200×200 animation with 5 tiles, or a 100×200 animation with 10 tiles.
And a screenobjects line like the following:
E,E+300,IMAGE0,TopMost,ServerControlled,900,501
Is the Randle GIF we named above (IMAGE0), that will display 300 pixels below the energy bar (E,E+300), on the Top layer, is activated through the server (ServerControlled), for two total animation lengths of IMAGE0 (900), and finally a unique image number that we give it (501).
For bongs (music), the ini file is much simpler to create. Just name it and reference the wa2 format song appropriately. The bongs are named in bong[Num].wa2 format, with the [Num] being what % number is used to play it (so this example is %191, which is most goal songs.)
Outfile=fm.lvz
File=bong191.wa2
Using these tools, you can take Arenas even further than what is currently usually done. You can have a small animation for your top scorers, an animation for a win, period break speeches with sync’d animation and audio. There are plenty of possibilities. Hopefully this has been helpful, and I recommend anyone interested with any more questions to ask around in the discord or on the forums for more information.